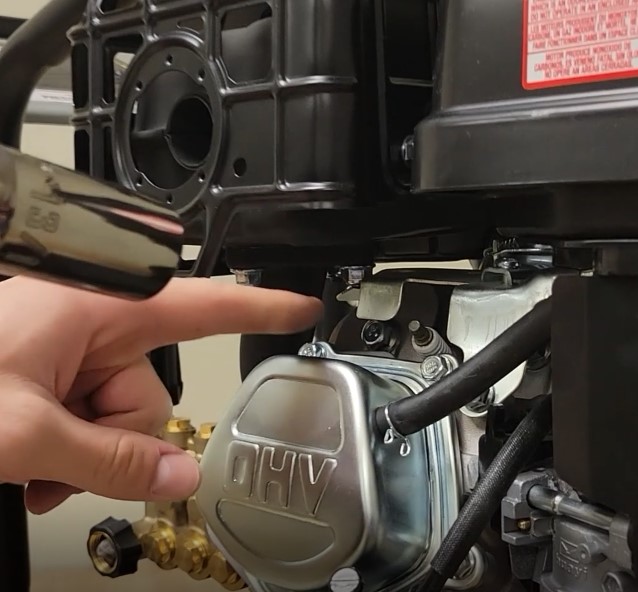
Important: Only work on the spark plug when the engine is cold to avoid burns.
Begin by removing any dirt and debris that may be around the spark plug boot. You do not want any debris to fall into the combustion chamber after the spark plug is removed. If needed, while wearing safety glasses, use a few quick busts of compressed air to remove any debris. Now you can remove the spark plug boot from the spark plug.
With a spark plug tool or socket and ratchet, loosen the spark plug. You should be able to fully loosen and remove the spark plug with your fingers. The center insulator should be white and the electrodes should show no or very little wear.
Electrode wear is common for spark plugs that have been used for many hours and indicate the plug should be replaced. Any other conditions noted, such has oil buildup, ash, blistering and fouling are indications of trouble that requires diagnosing by a trained service technician.
These are examples of spark plug conditions you may encounter:
Figure 1: Good spark plug. Normal wear and operating conditions.
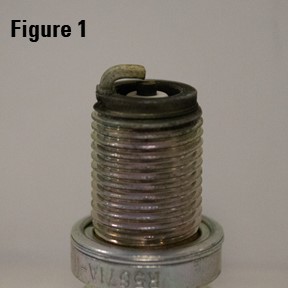
Figure 2: Replace spark plug. The carburetor is adjusted too lean (too little fuel) leading to overheating of the engine.
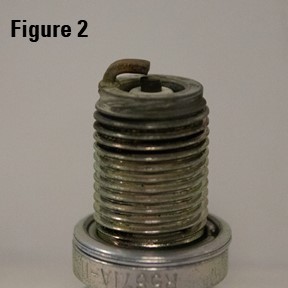
Figure 3: Replace spark plug. Gap is too close. Insufficient spark or misfiring.
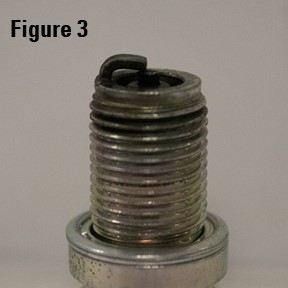
Figure 4: Replace spark plug. Gap is set too far causing misfiring, hard starting and possible overheating.
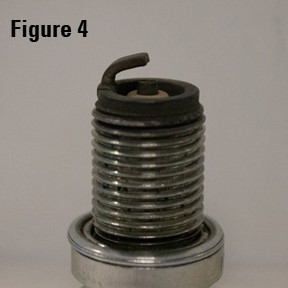
Figure 5: Replace spark plug. Missing electrode. This is a serious condition, as the electrode may have fallen into the engine. Do not just replace the spark plug. Contact a trained service technician for accurate diagnosis.
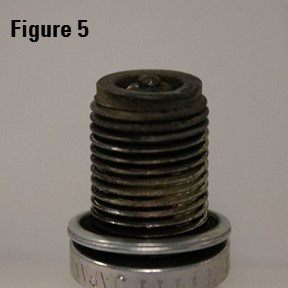
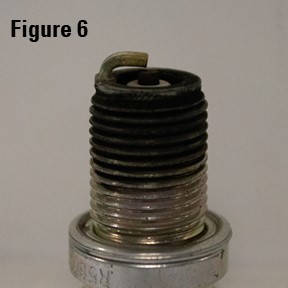
Figure 6: Replace spark plug. The carburetor is adjusted too rich (too much fuel) leading to overheating of the engine.
Next, look at the outside of the spark plug. The insulator should be free of cracks and carbon trails, the washer should be in place and free of cracks. If either is noted, replace the plug with a new one.
If the plug looks good, always make sure to check the gap before placing it back into the engine. This is done using a spark plug gauge and the gapping information from your engine owner’s manual.
If you need to replace the plug, make sure to only replace it with the exact model number or an equivalent cross-reference. Physically compare the new spark plug with the old one. If anything looks different, do not use the plug as engine damage may occur. As above, properly gap the plug before placing it in the engine.
Hand tighten the plug making sure to not cross-thread it into the cylinder head. Using the spark plug socket and a torque wrench, tighten the plug to the specifications inside your engine owner’s manual.
If you need further assistance, check out our service locator or contact our Customer Service Center at 1-877-362-4271 to find where your nearest service center is located.
